Setting up an Online Course in LEARN: One Historian to Another
 My six-minute introduction video. Also the longest video in HIST 216.
This is going to be an ever-evolving document, just to provide some tips and tricks to others working with LEARN at Waterloo to crash their history courses online. And, since it’s easiest to just put stuff on my website, you can all benefit too – even if you’re not a historian. I’m not judging.
I had the good fortune to take intensive online teacher training in Winter 2018, and then to teach a fully-online course in Winter 2020. So I can share a few particular tips and tricks that made my life a lot easier when teaching this course. Note that I am aware that I’m not an expert on online teaching, just a practitioner, but I thought some thoughts from a faculty member might be helpful as we contemplate remote teaching in Summer and Fall 2020. The team at Centre for Extended Learning is amazing, as are the great set of resources on Waterloo’s Keep Learning page.
The course was HIST 216: A (Long) History of the Internet. It was a lot of fun to give as an on-campus course, but a lot of fun to do online too.
Content
I’m not going to belabour content too much, as I had the advantage of an instructional design team to put the content together. If you’re doing emergency remote teaching, I think you should try to leverage open content as much as possible – for example, if I was teaching Canadian history, I would be using a lot of content from Belshaw’s fantastic Post-Confederation textbook.
In my course, content was mostly delivered through text. I had a few videos, but none were more than five minutes (an introductory video to let the students know me, and then a few other short videos introducing modules). But most content looked a lot like:
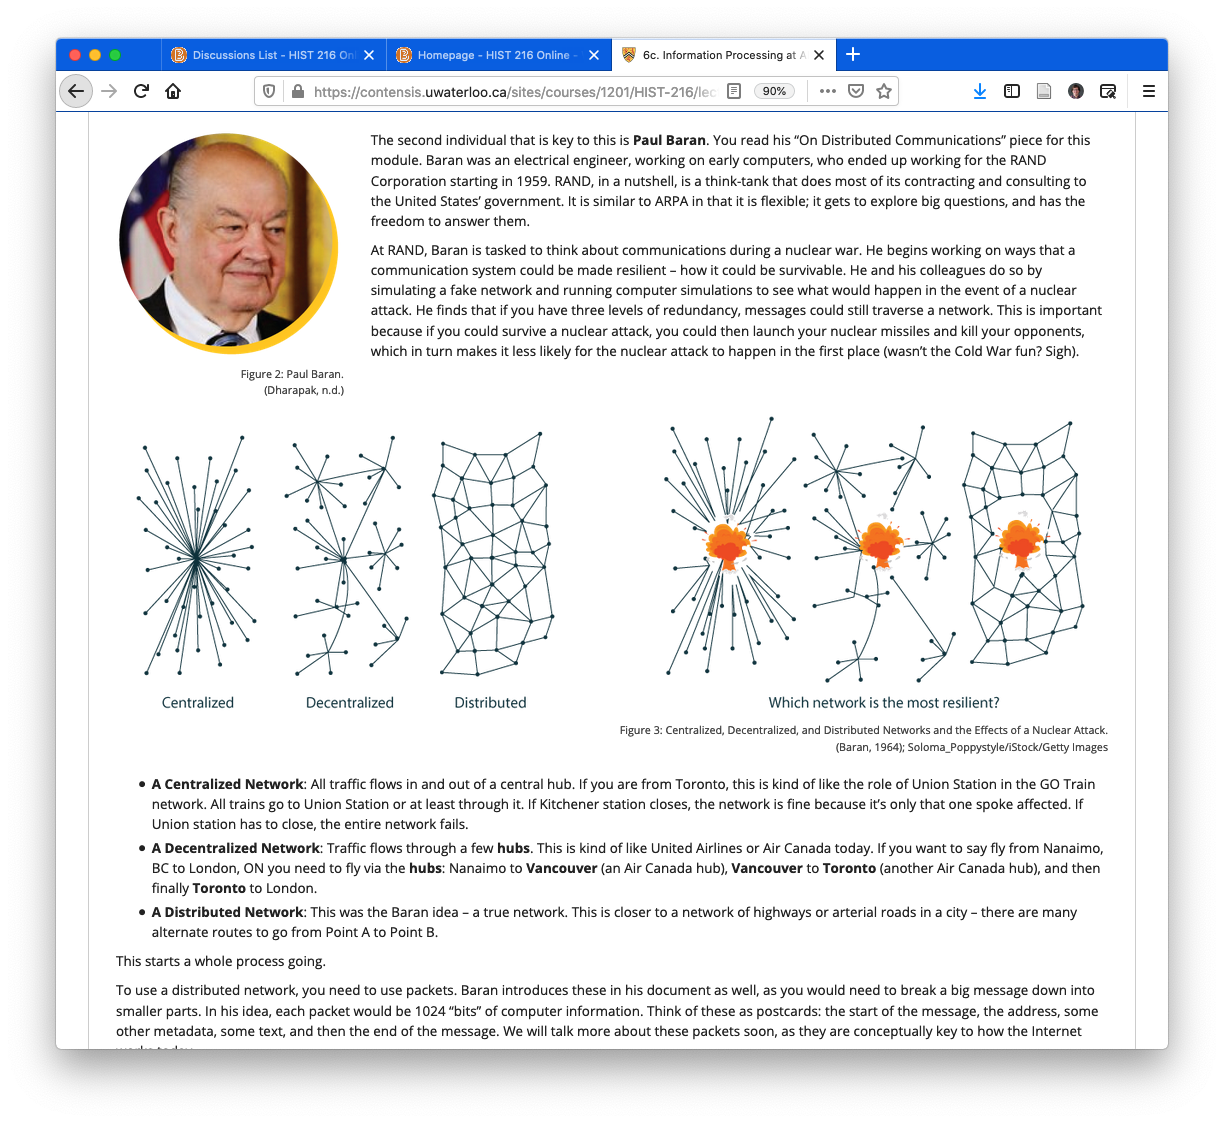
This was really the textual content of my lectures, turned into fancy beautiful prose and images by the developers at CEL. I like text because it’s accessible and easily editable, but with a script, you could also provide it in alternate formats (I say with a script as you want to be able to serve your diverse body of students).
The trick, to me, was how to get students to really engage with this great content!
Announcements
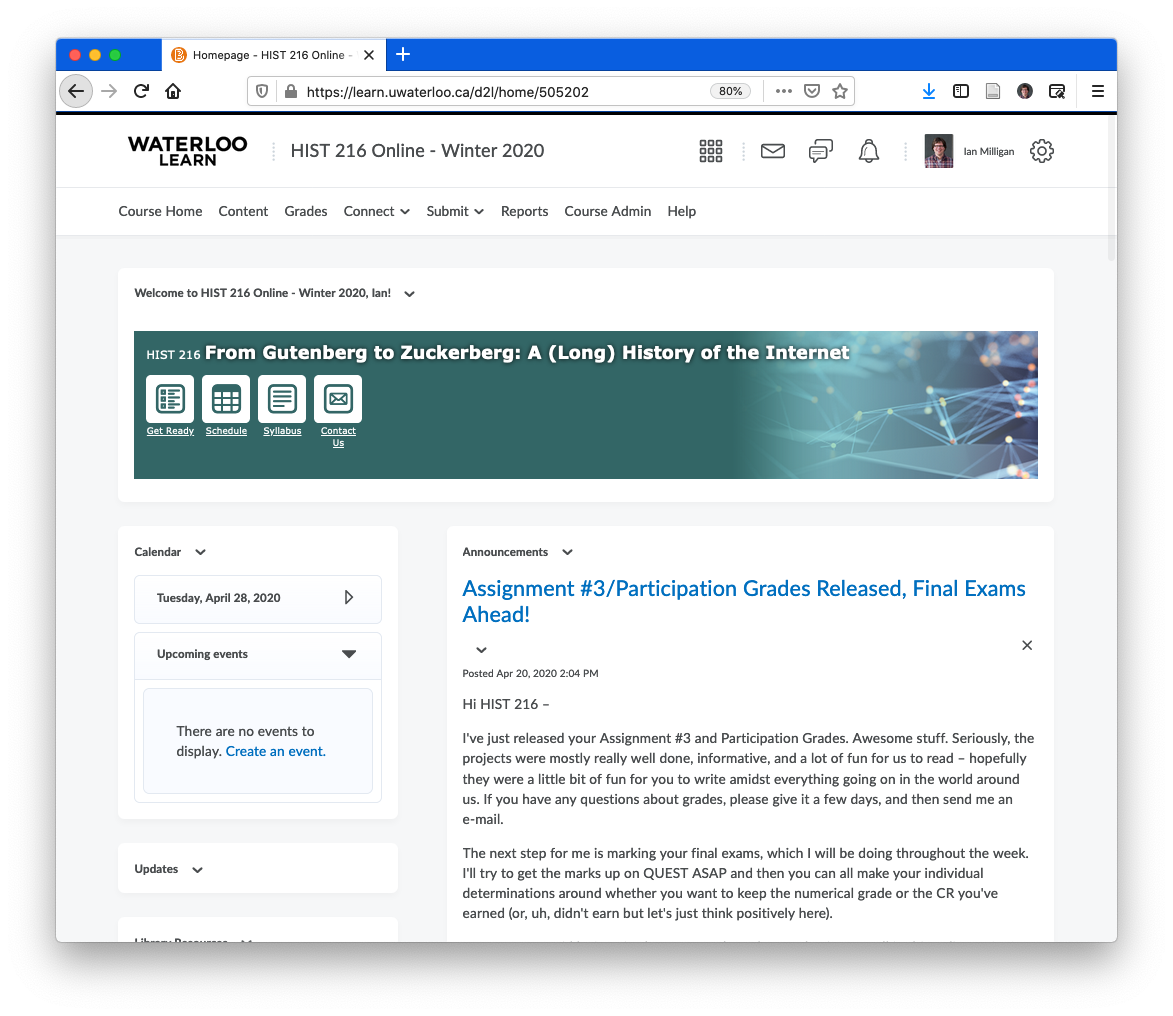
I use the announcements widget in LEARN quite a bit already, even when running an on-campus course. But in an online course, this was really important for me to make sure (a) students knew what was going on each week; (b) to anchor them to what’s going on in the world around us; and to (c) occasionally share a news article of interest. I try to use this relatively sparingly. Every week, at 9am on Monday, the “Module ahead” announcement would go out, and every week or two, I would also post something on Wednesday or Thursday.
My template for the Monday 9am announcements was:
- Opening remarks: I try to share a little bit about what’s going on, whether it’s weather or cool things going on in my life) and then a segue into what this module is all about in a paragraph.
- The course ahead: what’s on the horizon - i.e. upcoming major project deadlines, etc.
- Discussion forums and indvidiual activities: reminders about posts and any smaller assignments, as students got into the swing of things I tended to shrink this or exclude it.
It was also a useful way to remind people that I was there to answer any questions, etc., as I think in an online course it is really important to remember that instructors exist!
Discussions
The most important part of my course was the discussion board. The goal with this course was to make sure students were engaged throughout. I went back and forth on the weekly workload I asked of students, but I really didn’t want them to only come to the course before each of the three assignment due dates and right before the last exam.
So we did discussions. I must admit before teaching online I was wary of these. As an undergrad student in the olden days I’d had two courses that used online discussion boards, and I remember them being pretty awful: I’d submit my discussion post at the last minute, nobody would respond to it, and it felt more like an exercise in checking a box than anything approaching meaningful peer engagement.
The key components to making discussions work in my course was thus:
- Mandating a post and a response on a schedule: On a regular week, students had to post their response to discussion prompts by 11:59PM EST on Wednesday; they then had to post a reply to another student’s post, starting a thread, by 11:59PM EST on Friday. In practice, some students were very engaged and replied to lots of their peers. Others did not. This is the same as an in-person classroom (or faculty meeting or Senate!).
- Keeping groups small: This turned out to be a godsend. My initial gut reaction was to create small groups about the same size as what I would use in person, which are 10-15 student tutorials, with a TA assigned to oversee them. Thankfully, the Centre for Extended Learning recommended groups of four to six students. This was great. Students got to know each other, had familiar faces to engage with, and crucially - with such small groups - rarely did posts go unanswered. I did some initial triage in the first few weeks, to make sure that new students got assigned to groups that needed a bit of a boost in terms of numbers or active members, but ultimately, one downside is that some groups are less active than others. Some students will remain in your course but never log in (!).
- Actively participating as an instructor: I was certain to put language in the syllabus that the teaching team would read all posts but that we would not respond to all posts. You should do the same. In Week One, I endeavoured to reply individually to every student. For 50 students, that took around three hours (doesn’t sound bad compared to classroom time, but my fingers hurt). On an average week, I would go through all of the threads and reply to some of them. My goal was to show that I was there, but to not dominate conversation or discussion. Doing a weekly trawl of the discussion boards and chiming in would usually take about an hour. I did use TAs, and they did a good job of introducing themselves to the boards, although I did most of the conversational side (each TA worked on the boards differently of course).
The prompts were fairly detailed. Here’s an example:
I would like you to reflect on the prompts that you’ve responded to throughout the module. Post your responses to the following questions:
- Imagine a researcher in fifty years trying to reconstruct what life is like today. What three websites would you select to help reconstruct your world?
- What website would you feel most uncomfortable with if it was preserved? Why?
- How, in a paragraph, do you think we should be handling the ethical concerns you outlined in your previous answer? Be prepared to discuss with your classmates the ethical pros and cons of preserving and working with this type of material.
I was very happy with the results of this. I think the students, many of whom were used to online courses, were more comfortable with this than I was!
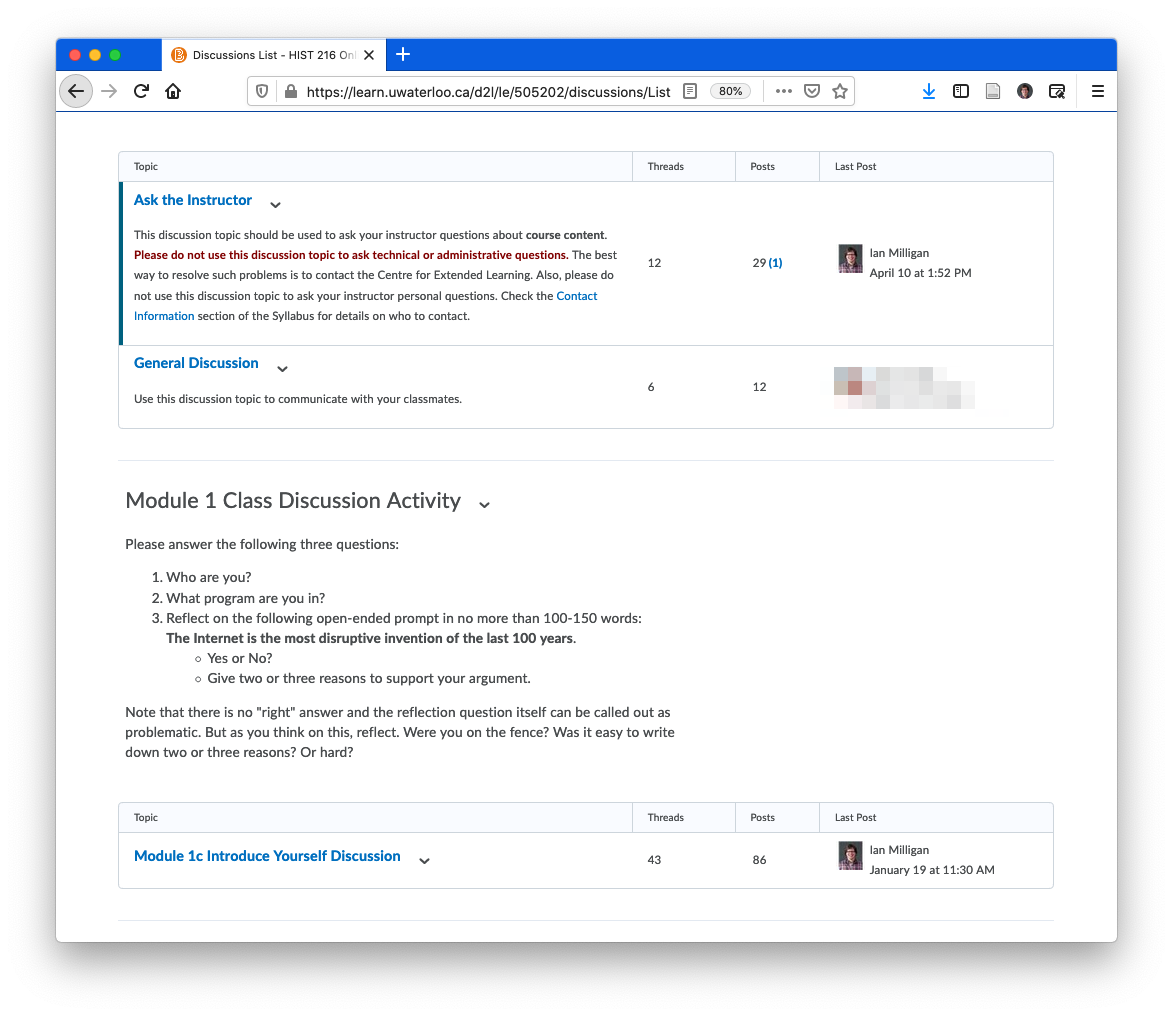
Some of the details on the setup included:
- All students had access to a “General Discussion” board and an “Ask the Instructor” one: I made sure to subscribe to the latter via e-mail, so it would ping me as soon as a student posted there. E-mail is a lot higher in an online course, but this saved me some citation questions.
- Students could see all posts from their groups, but not from other groups: They could see everything the other 4-5 students in their group posted. I didn’t set it up to hide them before they posted their thoughts, as even in their initial thoughts they could echo or layer upon other posts.
- I used LEARN to auto-enrol students: LEARN was good on the initial set up, but remember, when students join the course you don’t get a notification and they don’t get auto-assigned to a team. Even if there is a hidden auto-assignment setting, you probably don’t want to have it on: you want to make sure they get assigned to groups that might need another active voice! (And remember, “Test Student” is in there too, so don’t let them screw you up)
Flexibility and Pivoting
This is important. I learned the hard way, for example, that I needed to provide more information about how to use the Internet Archive’s Wayback Machine than I had before. This is because when you’re teaching in a classroom, you can monitor faces and do lots of on-the-fly instruction; less so when you’re online.
So I created this short YouTube video to help people out at one point because I felt like I was getting several good questions from students that required more than just e-mail help!
I use Camtasia to make my screen recordings, although it is pricey. You could do something similar with the basic video editor on your OS, such as Microsoft’s Video Editor or Apple’s iMovie.
Closing Thoughts
Good luck with shifting your own course! Tough times are ahead, but I think by looking at tips like this (and others from Keep Learning) we can all use our time as effectively as possible. I am also happy to help however I can.
)
Ian Milligan
Associate Vice-President, Research Oversight and Analysis
Professor of History
Exploring how technology is transforming historical research.